


Most people spend a lot of time choosing a tattoo artist and almost no time thinking about their reference photo. That is a mistake. In realism and animal portrait tattooing, your reference photo is the foundation everything else is built on. A skilled artist can only work with what you give them — and a blurry, poorly lit, or heavily filtered image will limit what is possible regardless of how talented the person holding the needle is. This guide breaks down exactly what makes a strong reference photo and how to find or take one before your consultation.
Why Your Reference Photo Matters So Much
Realism tattooing does not work the way other styles do. There are no bold outlines to hold structure together, no flat fields of colour to fill. Everything — depth, texture, likeness, dimension — comes from the interplay of light and shadow in the reference image. If those tonal values are not visible in the photo, the artist cannot recreate them in the skin.
A strong reference photo gives your artist three distinct tonal groups to work with: dark tones, mid-tones, and light tones. All three together create volume and dimension. A photo where the light source is behind the subject collapses that range — you lose the highlights entirely, and the finished tattoo ends up flat and difficult to read as it ages. This is one of the most common and preventable problems in portrait tattooing.
What Makes a Good Reference Photo
Resolution and Clarity
Resolution is the single most important technical factor. High-resolution images above 300 dpi allow an artist to zoom in on the fine details — individual hairs, texture in fur, the catchlight in an eye — without the image dissolving into pixels. A blurry screenshot, a heavily compressed social media image, or a photo that has been shared multiple times and degraded in quality will all limit what your artist can capture.
When sending your reference to your artist, always send the highest resolution version directly from your phone’s camera roll or original file. Do not send via text message — compression during sending can strip out significant detail. Email or a file-sharing link is preferable.
Lighting
Lighting makes or breaks a realism reference. The ideal light source comes from slightly above and to one side of the subject — this angle reveals the contours of a face or an animal’s features, creates natural shadow, and produces the full range of tones an artist needs to build depth.
Avoid photos where:
- The main light source is directly behind the subject, creating a silhouette or washing out the face
- The flash has fired directly at the subject, flattening all shadows and creating harsh white highlights
- The image was taken in very low light, making the whole photo noisy and detail-poor
- The photo has been edited with heavy filters that alter the true tonal values
Natural light from a window or overcast daylight tends to produce the most usable references — soft, even, and revealing of texture without harsh hotspots.
Composition and Framing
For portrait and animal tattoos, close-cropped images almost always work better than full-body or wide shots. A photo that fills the frame with just the face — whether human or animal — gives the artist far more detail to work with and allows for a larger, more legible tattoo. When the subject is small within the frame, important details like the eyes, the texture of fur, or the expression of the face all become harder to capture with accuracy.
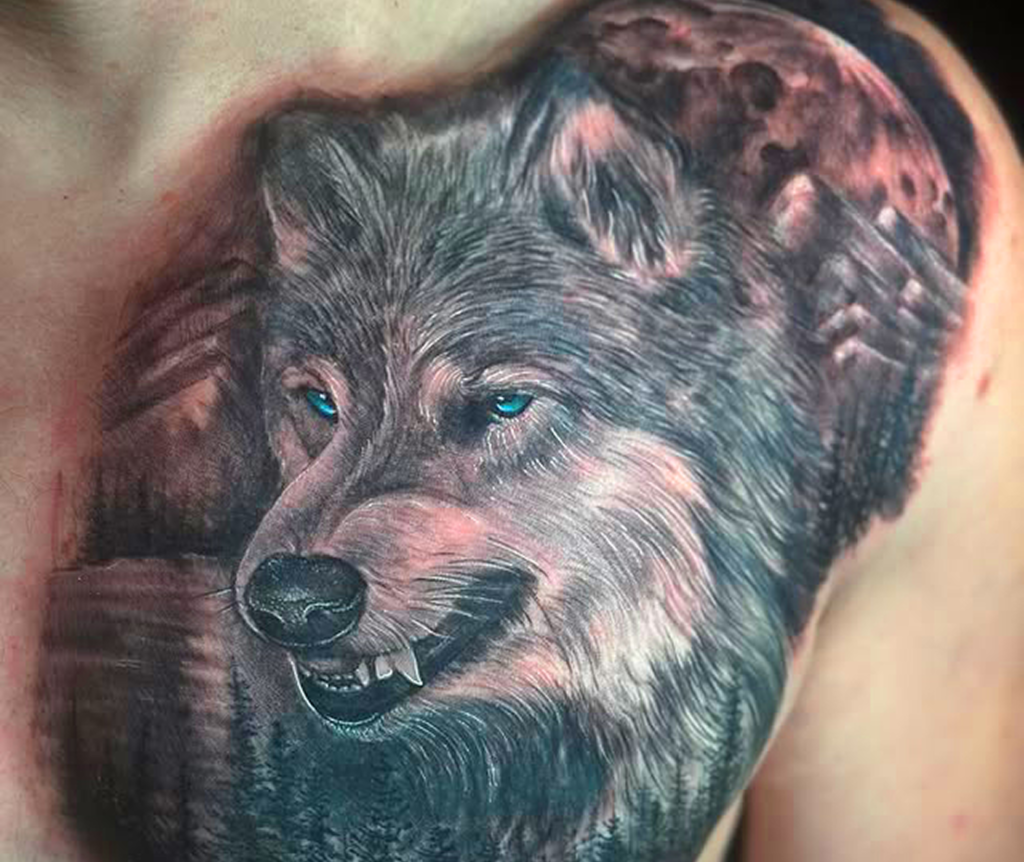
For animal portraits specifically, a clear, straight-on or slightly angled view of the face with even lighting and minimal harsh shadows tends to produce the strongest results. The eyes are typically the focal point of any animal portrait tattoo — they need to be sharp, well-lit, and clearly visible in the reference.
Contrast and Tonal Range
Check that your image has a good balance of light and dark. A reference photo that is uniformly mid-toned — no real darks and no clear highlights — will produce a flat, muddy tattoo. Strong contrast in the reference translates directly into depth and dimension in the finished piece. This is especially important for black and grey realism, where the entire illusion of three-dimensionality depends on contrast rather than colour.
Reference Photos for Animal Portraits Specifically
Animal portrait tattoos present some unique challenges that are worth thinking about before you go searching for images.
Fur and feather texture requires a photo where individual hairs or feathers are visible and sharp. A slightly soft or motion-blurred photo of a pet, however charming, will not give your artist enough information to recreate texture convincingly. Get as close to the subject as possible and use your camera’s portrait mode or macro setting to maximise sharpness.
The eyes are where animal portraits live or die. They need to be in focus, well-lit, and showing the catchlight — that small specular highlight that makes eyes look alive rather than flat. A photo where the eyes are slightly out of focus or in shadow will result in a tattoo that never quite looks right.
Send multiple angles. A single front-on photo of your pet tells your artist less than three or four images taken from slightly different positions. Different angles reveal how the face is structured in three dimensions, which becomes important when the design needs to wrap around a curved body part like an arm or a thigh.
What to Avoid
Heavily filtered photos. Instagram filters, portrait mode beautification, and AI-enhanced photos all alter the true tonal structure of an image. What looks appealing on a phone screen may be misleading to an artist trying to understand the actual light and shadow in the scene.
Screenshots of other tattoos. Reference images for realism should always be photographs, not photos of other tattoos or drawings. Another artist’s tattoo as a reference is also an ethical issue — it is not a starting point, it is someone else’s finished work.
Low-light phone shots. Most phone cameras struggle in low light and compensate with digital noise and softening. A photo taken indoors under dim artificial lighting will rarely give an artist enough tonal information to work with effectively.
Photos that cut off important features. If the top of the head, an ear, or the tip of the nose is cropped out of your reference image, your artist will have to either invent those elements or design around the gap. Send complete images wherever possible.
How Many References Should You Bring?
More is almost always better. Bringing five or six images — from slightly different angles, in different lighting conditions, showing different expressions — gives your artist options and helps them understand the subject as a three-dimensional thing rather than a flat picture. If you have a particular feature you love about the subject, point it out. If there are features you are less concerned about, say so. The more context your artist has, the better equipped they are to make decisions when the translation from photo to skin requires adaptation.
Frequently Asked Questions
Can my artist work from an old or low-resolution photo?
Experienced artists can work with difficult references, but the result will always be limited by the quality of the source material. A skilled artist working from a poor photo will produce a better tattoo than an inexperienced artist with the same image — but even the best artist in the world cannot invent detail that is not there. If the only photo you have of a loved one is old or low-resolution, ask your artist honestly what is achievable before you commit.
Do I need a professional photograph?
No — a well-taken photo from a modern smartphone is more than sufficient for most realism tattoos. The key factors are sharpness, resolution, and lighting, not the equipment used to take it. A DSLR camera will give you more control, but a careful phone photograph taken in good natural light will often outperform a rushed professional shot in poor conditions.
What if I want to combine elements from multiple photos?
This is common and entirely workable — many realism tattoos are composites of several reference images. Share all of the individual photos with your artist and explain what you want from each one. Your artist will handle the process of combining elements into a coherent composition. The more clearly you communicate what you want from each image, the smoother that process will be.
Should I send my reference photos before or at the consultation?
Before, if possible. Sending your references ahead of the consultation gives your artist time to assess what is workable, identify any challenges, and come to the appointment with informed questions. Arriving with references only on the day can limit the depth of conversation you are able to have.
Does the reference photo need to match the tattoo style I want? Not necessarily. If you want a black and grey realism tattoo, a colour reference photo is still useful — your artist will interpret it into the appropriate tonal range. What matters most is that the photo is sharp, well-lit, and contains enough detail and contrast for the artist to work from confidently.